Showing posts with label tutorial. Show all posts

Friday, 5 April 2013

Little Miss Muffett Tea Party Day2 - Tutorial: Inky Background Using Embossing Folders

Welcome back to day 2 of the combined release of Simply B Stamps and Little Miss Muffett! For our second day of the release we wanted to share with you fabulous inspiration and tutorials and prizes on both store blogs ...

My project displayed on the LMM blog uses an inky background created with embossing folders. I would like to share with you how to create this inky background ... a technique I only recently discovered but I am completely hooked because it is so easy and rewarding  ... and there are so many possibilities. These are the materials I used for this tutorial: embossing folder, various distress and VersaMark/Magic inks, embossing powders
Step 1: 
Ink up your embossing folder, partially or in full (this depends on your project). Make sure that the area you want to have inked is well-covered with ink to get a nice inky imprint on your paper
Step 2:
Once the paper is embossed you can 'improve it' by applying more ink by skimming over the raised areas with any kind of ink
 
including VersaMark ink. If you use VersaMark ink, just sprinkle your embossing powder over the project and heat-emboss it (right-hand image)

And for the adventurous (lol) double-emboss all of your paper, use VersaMark ink to ink the embossing folder, sprinkle embossing powder over the project and heat-emboss it. And do the same for the raised areas

Using one of my inky backgrounds I created this project

ink embossed background (distress inks: victorian velvet, fired brick)
paper doily inked (distress ink: festive berries)
combined with the wonderful images from SBS and LMM coloured with colouring pencils and Copics and glittered with lots of golden Stickles 

Hope you will play with embossing folders and ink and enjoy it as much as I do. For even more amazing inspiration and How To's, hop over to the LMM blog! Petra.




Tuesday, 6 September 2011

Let's Reuse - Paperbeads

Have you ever asked yourself what to do with all these advertising brochures which come through your letterbox? Quite often they have a good size, nice colours and the paper might have an appealing texture. With Vicki's new challenge at the Cheerful Stamp Pad: Let's Reuse I decided it was time to do something with these brochures which are sort of piling up in my crafty corner.

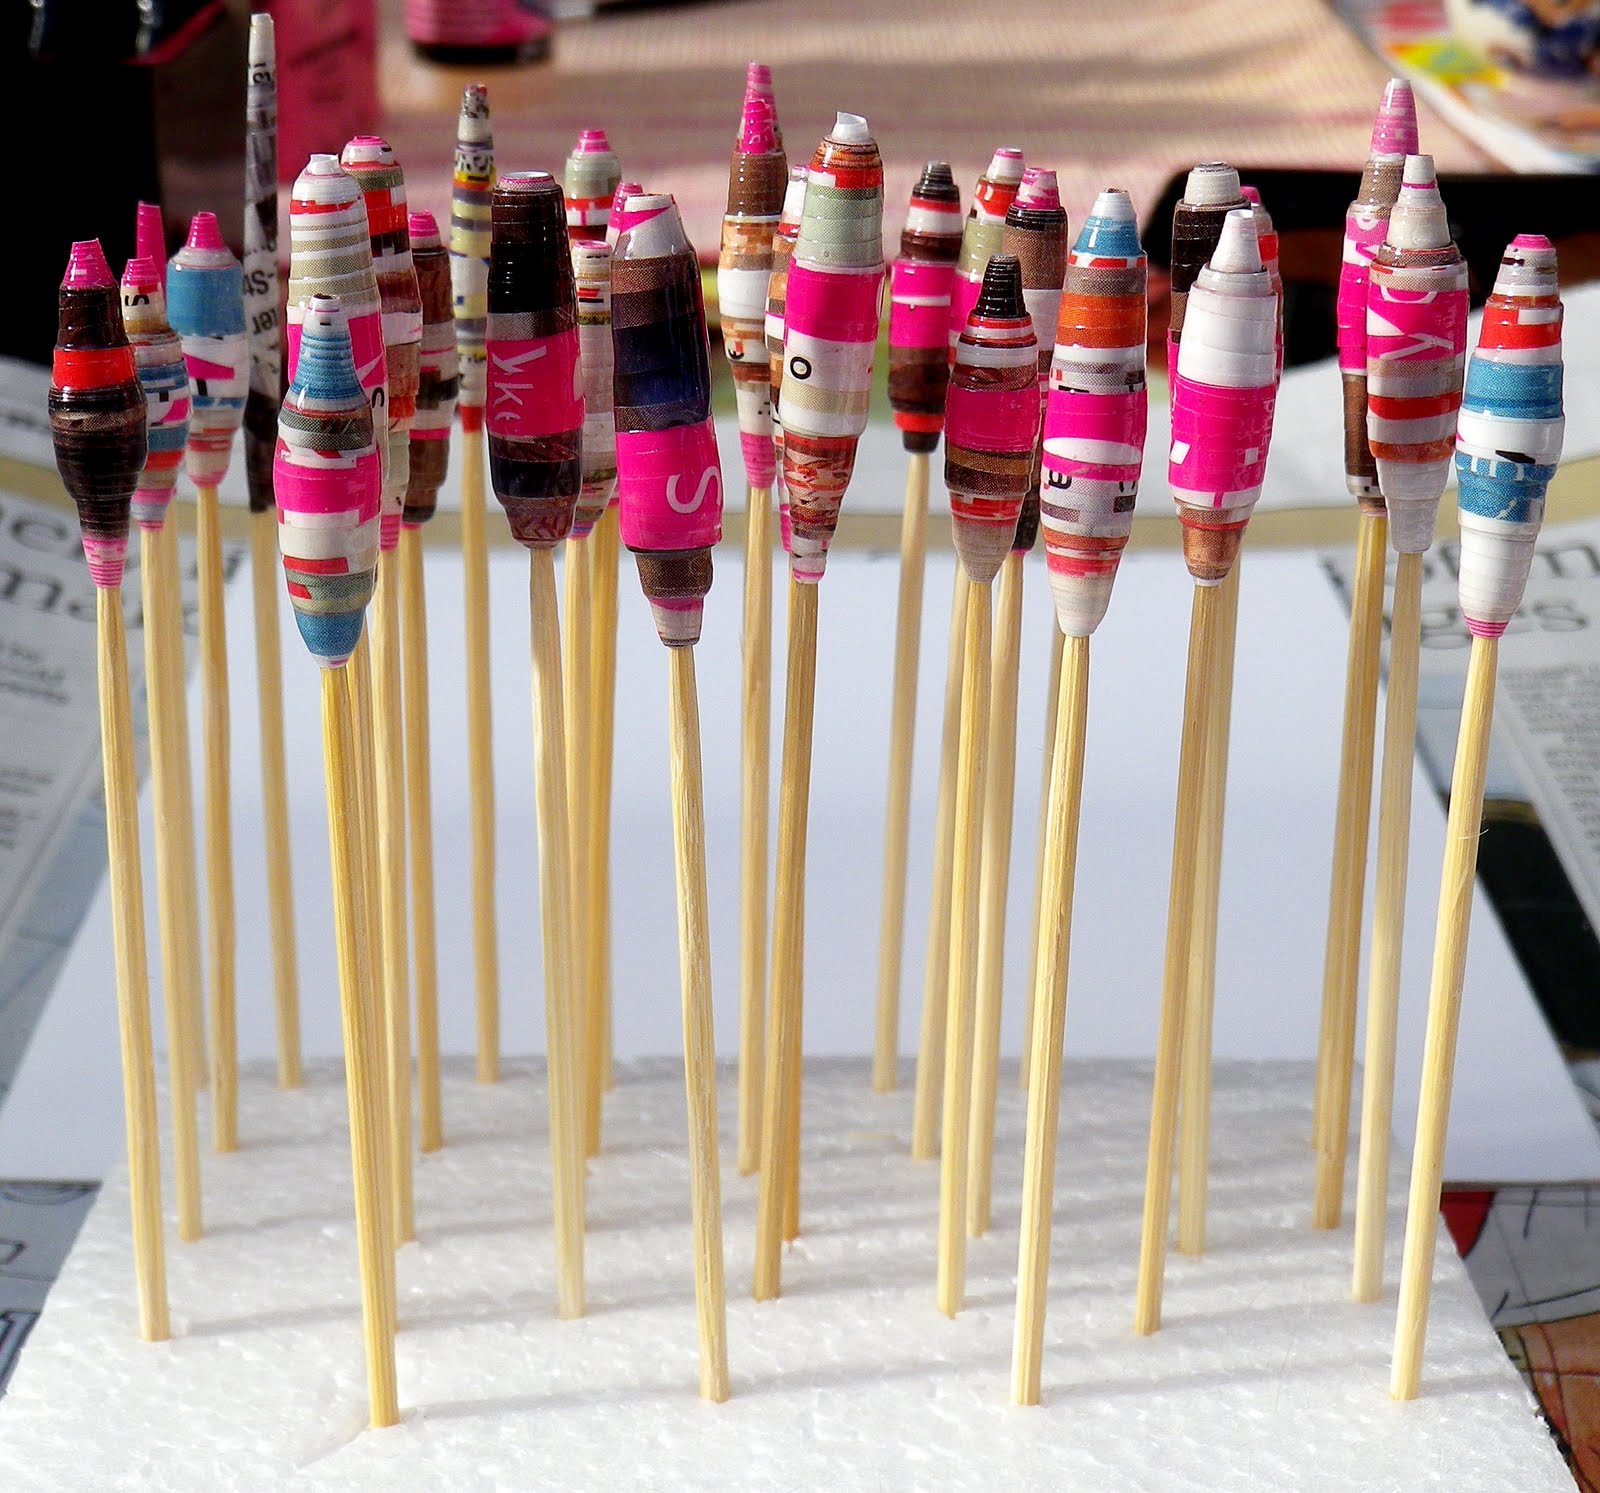
I started to cut one of the brochures in triangles - very long and pinty but very slim to make paperbeads. I would have never imagined this to be so much fun and thought I make a little tutorial to share it with everybody:
1 It all starts with long pointy thin paper triangles


2 Take one of them and find something round like a knitting needle (just make sure that it is thick enough to leave a nicely sized hole in the middle of your beads) and begin rolling the paper around the needle starting on the wide end. Roll it as tighly as possible and as regular as you wish - paper is amazingly flexible and don't worry if it gets ripped in the process, just add it on maybe securing it with a little dab of glue


3 I only add some glue to the paper when 3 to 5 cm of the paper left, continue to roll. Don't worry if some glue squidges out on the sides just continue with the rolling


4 Once you have finished give the glue a few seconds to settle and then the bead of the needle


5 What to do now with such lovely beads? For stability and to smooth the surface I covered some with Modge Podge and some with glossy accents. Of course, you could also paint them with acrylic paint, roll them in Versamark ink and emboss them with UTEE, ..... and turn them into wonderful embellishments, charms, .....


Of course, you can give the beads different shapes, sizes and uses. Just have a play, it is so much fun but be aware ... it is addictive as well! Hope to see you over at the Cheerful Stamp Pad, Petra.

Monday, 7 December 2009

Crunchy Flowers - How To

Thank you for all the interest in how I created the crunchy flowers on my last matchbox so I thought I just give some tips. It is really very easy:
Cut your card (I prefer slightly thicker card, I think it gives a better result) in any flower shape you like (I stamped a pointsettia from Elzybells onto slightly patterned card and then I had to cut out the flowers.)

Now you need a bowl of water and off you go:

soak the card (the card flowers floating in the water look actually quite nice :-) )

take the card out of the water and crunch it. Don't worry card is much tougher than you might think.

Now open up your little parcels and give the flowers any shape you like. Leave them to dry before using them on your project. When fully dried, the flowers will be quite hard and actually quite tough. And ready for further embellishments.

Have fun, Petra.


Saturday, 21 November 2009

Christmas decoration - Paper Bauble

A few years ago I saw a charming paper bauble in a Christmas magazine but only now when I saw the Docrafts challenge 'Deck the Halls' I remembered the bauble and created a prototype to see how it works out. I chose cool colours (white/grey/glitter/blueish)


For this project I recycled the 'past' by using old Christmas cards. How to:
* choose a colour scheme which you like
* cut out 21 same sized circles
* on each circle draw a triangle with same length sides touching the edge of the circle at all three points
* score and fold along the lines of the triangles
* top and bottom: for each glue 5 circles together along the flaps so that they form a long line and then join them for a bigger circle
middle part: glue together the remaining 10 circles so that they form a long line and then join them for a bigger circle
* glue the top and the bottom to the middle circle
* pierce the top and bottom and thread a ribbon or thread through

You can also add your personal touch by using buttons, pearls, etc for decorating the bauble even further.
Have a nice weekend, Petra.

LinkWithin

Related Posts with Thumbnails